
Strata Repairs and Maintenance
Lesson 6: Painting a repair so it disappears
Goal: finish a repair so a resident walking past can’t tell where it was.
A perfect patch with a bad paint job still shows. Most visible repairs in strata corridors are paint problems: the wrong sheen, an unsealed patch, or a touch-up that stops in the middle of a wall.
Why touch-ups show
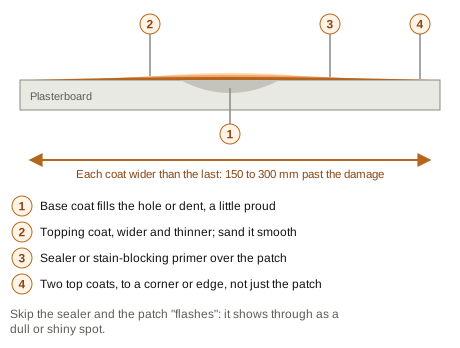
- Flashing: bare compound and fresh plaster soak up paint, so the patch dries flatter (or shinier) than the wall around it.
- Wrong sheen: low sheen next to flat, or semi-gloss next to low sheen, catches the light differently even in the same colour.
- Fade: paint on a wall changes colour over years with light and cleaning. Fresh paint from the same tin can look a shade different.
- Texture: a roller leaves a texture (stipple). A patch painted with a brush is smooth, and shows.
The layers
Step by step
- Protect. Drop sheet on the floor, painter’s tape on skirting and frames, a sign on the corridor. Paint smells: tell nearby residents, especially in a closed corridor.
- Clean. Wash the area with sugar soap, rinse with clean water, let it dry. Corridor walls at hand height are greasier than they look.
- Sand. Scuff the existing paint lightly with 180 grit so the new paint grips, and sand the patch flush. Wipe off the dust with a damp cloth.
- Seal the patch. One coat of plasterboard sealer or an undercoat over the patch and a little beyond. Over water stains, use a stain-blocking primer instead (Lesson 7).
- Cut in. With an angled brush, paint a 50 mm band along the corners, the ceiling line, skirting and frames, a wall at a time.
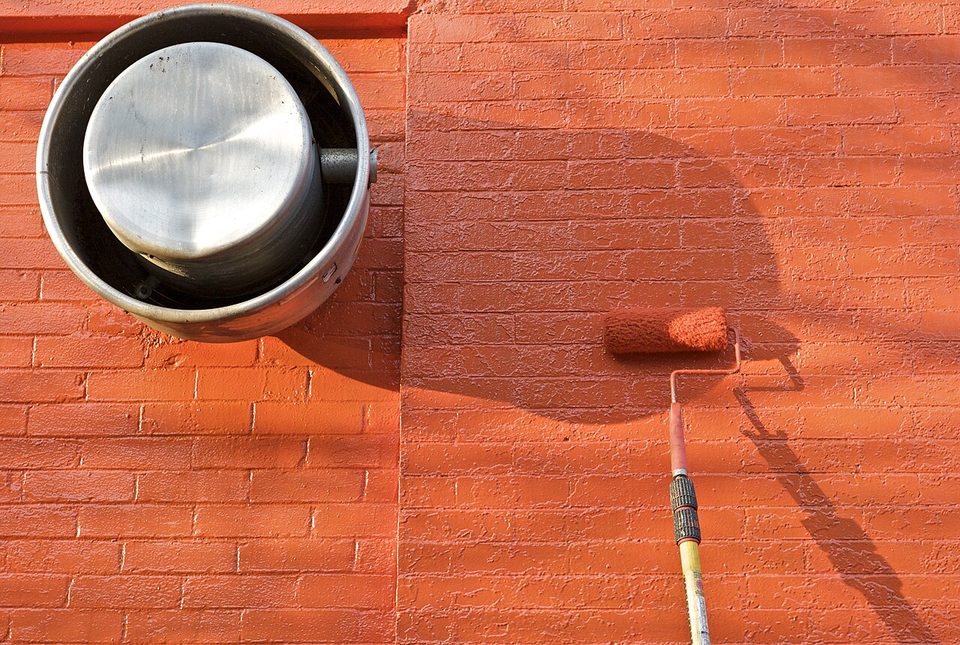
- Roll. While the cut-in is still wet, roll the wall in sections about a metre wide, top to bottom, in a W pattern, then lay off with light vertical strokes. Keep a wet edge: always roll back into wet paint.
- Second coat after the drying time on the tin. Two coats is the minimum for an even finish.

Paint to a break
Practitioner tip: never stop a touch-up in the middle of a wall. Paint the whole wall from corner to corner, or from a corner to a door frame. The eye accepts a slight difference across a corner; it spots one in a flat wall immediately. On ceilings, paint the whole ceiling between two cornices or beams.
Choosing paint
| Surface | Usual paint | Sheen |
|---|---|---|
| Corridor and stairwell walls | Interior acrylic, washable | Low sheen (wipes clean, hides flaws) |
| Ceilings | Ceiling paint | Flat (hides flaws, reflects light evenly) |
| Wet areas (laundry, bathrooms) | Kitchen and bathroom acrylic with mould inhibitor | Low sheen or semi-gloss |
| Doors, frames, skirting | Water-based enamel | Semi-gloss or gloss |
| Steel balustrades and gates | Etch primer or rust primer, then enamel | Gloss |
Use the building’s paint record (Lesson 3). If there isn’t one, take a chip of the paint (cut neatly from a hidden spot, behind a door) to a paint shop for a computer match, and buy a test pot first.
Manufacturer says: read the tin for drying and recoat times, temperature limits and the right primer. Most acrylics don’t like being applied below 10°C or in direct hot sun.
Cleaning up
Wash water-based brushes and rollers in a bucket, not down a stormwater drain or the street gutter. Let the paint settle, pour off the clear water into the sewer (a laundry tub), and put the dried sludge in the general bin. Take leftover paint to a paint recycling drop-off (many councils and paint shops run Paintback collection).
At Jacaranda Court
The level 3 corridor repairs from Lesson 5 are sanded. You seal them, then paint the whole wall from the lift lobby corner to the fire door frame, in the low sheen “corridor grey” from the paint record. The next morning the committee chair walks past and can’t find where the gouge was. That’s the standard.
On the job 6
Find a touch-up in your building that shows. Work out why (flashing, sheen, fade, texture or stopped mid-wall) and redo it to a break.
Sources
- Paintback, Leftover paint and packaging drop-off
- Australian Government (2016), Lead Alert: The six step guide to painting your home, 5th edition (preparing old paint safely)
Quick quiz
Pick an answer for each question. Nothing is recorded.
General education, not trade or legal advice. Licence limits, asbestos rules and window safety laws differ by state and change, so check your regulator before you quote or start. If a job involves electricity, plumbing, gas, waterproofing, fire doors or anything you think may contain asbestos, stop and get the right licensed trade.