
Strata Repairs and Maintenance
Lesson 5: Patching plasterboard and plaster
Goal: patch any hole in plasterboard so it’s flat, strong and invisible after painting, and know which cracks are cosmetic and which aren’t.
Inside most Australian apartments built since the 1970s, walls and ceilings are lined with plasterboard: a gypsum core between two sheets of paper, screwed or glued to timber or steel frames. It is easy to damage and easy to repair. Older buildings may have solid plaster on brick, and outside walls are often rendered masonry; those are covered at the end.
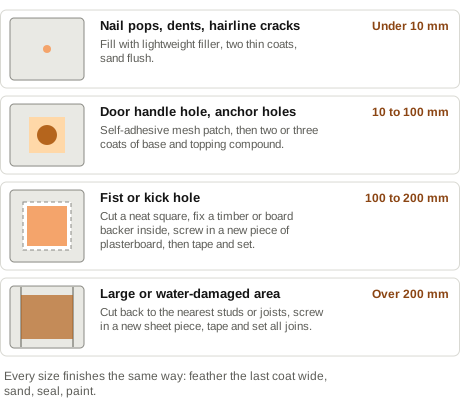
Pick the repair by size
Compounds in plain English
- Lightweight filler (ready-mixed tub): for small holes and dents. Easy to sand, but weak. Not for anything that bridges a gap.
- Base coat (setting compound, a powder you mix): sets hard by chemical reaction, in a time printed on the bag (20, 45 or 90 minutes). Use it for the first coats over tape and patches. Sets even when thick, but it’s hard to sand, so keep it below the surface.
- Topping compound: smooth and easy to sand, for the final one or two coats.
- All-purpose (ready-mixed): does both, at the cost of more shrinkage and longer drying.
Manufacturer says: mix and use compounds as the bag says. Setting times, coat thickness and drying times vary by product.
Small: dents, nail pops and hairline cracks
- Nail or screw pops (a round bump or crack over a fixing): drive a new screw 40 mm away to pull the sheet back to the frame, then drive the popped one just below the surface.
- Scrape off loose paint and paper. Dust off.
- Press filler in with a 50 mm knife, then scrape it flat with a firm pass.
- Let it dry, then a second thin coat a little wider. Sand flush with 180 grit on a block. Feel it with your fingertips: you can feel a ridge you can’t see.
Medium: holes up to about 100 mm
- Trim any torn paper and crumbled gypsum back to firm board with a utility knife.
- Stick a self-adhesive mesh patch over the hole, at least 25 mm bigger than the hole on every side.
- First coat of base compound over the mesh with a 100 mm knife, pressing it through the mesh. Keep it thin.
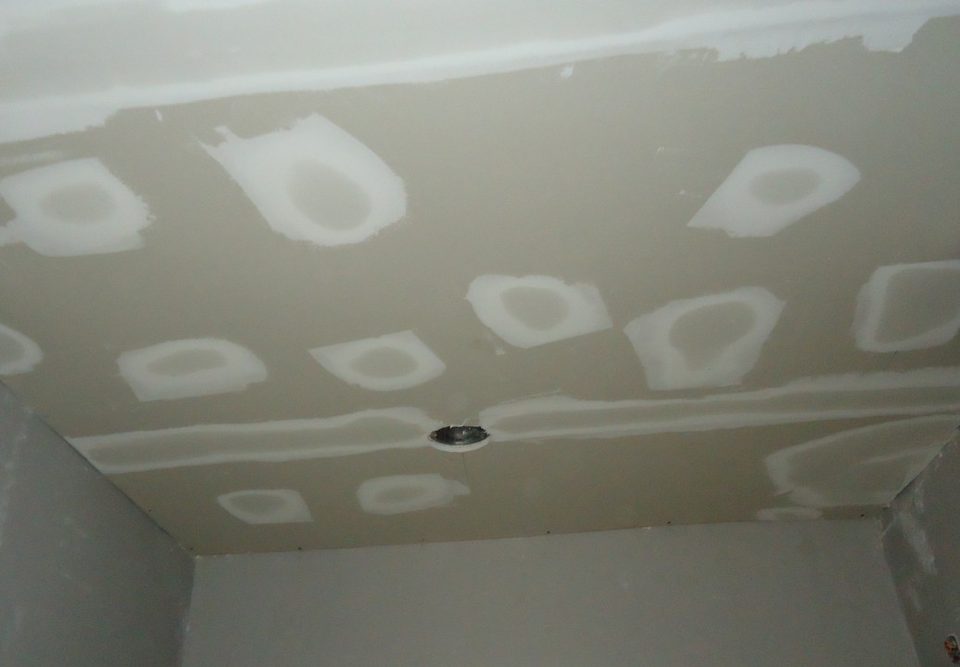
- Second coat once it’s set, wider (feather it 50 mm past the first).
- Topping coat, wider again. Sand lightly. Seal and paint (Lesson 6).

Practitioner tip: the commonest medium hole in a strata building is a lever handle through the wall behind a door. Repair it, then fit a door stop (skirting-mounted or floor-mounted) or adjust the closer’s backcheck (Lesson 10), or you’ll be back next month.
Large: kick holes and bigger
- Use a stud finder and a cable and pipe detector. Mark a neat square or rectangle around the damage, avoiding any services.
- Cut along the lines with a jab saw. Cut shallow near the edges in case there is a cable you missed.
- Screw a backer inside the hole: a strip of timber or plasterboard offcut, longer than the hole, held to the back of the sheet with screws through the face, top and bottom.
- Cut a new piece of plasterboard the same thickness (usually 10 mm walls, 10 or 13 mm ceilings) to fit, and screw it to the backers.
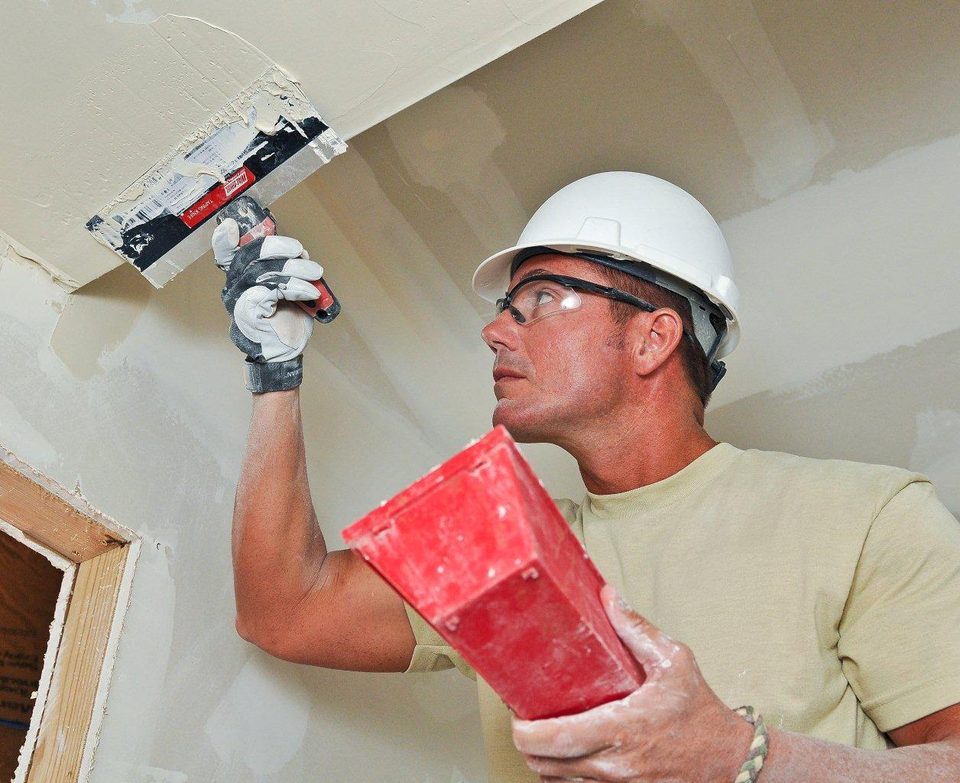
- Tape all four joins with paper or mesh tape bedded in base compound, then two coats over the top, each wider, then topping. Sand, seal and paint.
For water-damaged sections bigger than your hand, cut back to the nearest studs or joists so the new piece is fixed to the frame, and replace the insulation behind if it got wet. If the damaged area is bigger than a sheet or it’s a ceiling, consider a plasterer: big jobs are faster and flatter in their hands, and may pass your state’s value limit.

Corners
External corners (the edge of a wall around a corridor bend) take the most hits from trolleys and furniture. Damaged metal or plastic corner bead is cut out with snips, a new length is fixed with compound or staples, and then coated like a joint. In high-traffic spots, a clear or painted corner guard saves you redoing it every few months.
Cracks: cosmetic or a warning?
| Crack | Usually means | What to do |
|---|---|---|
| Hairline, along a plasterboard joint or at a cornice | Normal movement and shrinkage | Rake out, fill with flexible acrylic gap filler, paint |
| Comes back after every repair in the same place | The building moves there (seasonal, thermal) | Flexible sealant or a paper tape repair, not hard filler |
| Diagonal from the corner of a door or window, widening | Structural movement | Photograph with a ruler, date it, report it |
| Wider than about 5 mm, or the doors near it have started sticking | Possible structural problem | Report to the strata manager for an engineer’s opinion |
Practitioner tip: to see whether a crack is moving, draw pencil lines across both ends with the date and measure the width. Check again in a month.
Solid plaster and render
In older buildings, internal walls may be solid plaster on brick, and external walls render. Small holes and chips: dampen the hole, fill with a patching plaster or render repair mix in layers no thicker than the packet says, and finish flush. Large drummy areas (hollow-sounding when you tap them) have come away from the brick and need a plasterer or renderer. Outside, any crack wide enough to let water in is a leak waiting to happen (Lesson 4).
At Jacaranda Court
A removalist’s trolley has left a gouge and two dents along the level 3 corridor and smashed the corner bead at the lift lobby. You photograph the damage before anything else, and send it with the move-in date to the strata manager (Lesson 12). Two dents get lightweight filler. The gouge gets a mesh patch. The corner bead is cut out and replaced. Total: two visits, because compound has to dry, and one corner guard ordered.
On the job 5
Walk one corridor and count the patches you can see on the walls (shadows, ridges, a different sheen). Each one is a patch that wasn’t feathered or sealed. Fix one properly, then compare.
Sources
- Gyprock (CSR), Gyprock plasterboard guides and the Red Book installation guide
- Safe Work Australia, Crystalline silica and silicosis (cutting render and masonry)
Quick quiz
Pick an answer for each question. Nothing is recorded.
General education, not trade or legal advice. Licence limits, asbestos rules and window safety laws differ by state and change, so check your regulator before you quote or start. If a job involves electricity, plumbing, gas, waterproofing, fire doors or anything you think may contain asbestos, stop and get the right licensed trade.